Choose your country and language
- Nederlands, Belgique / België
- Česky, Česká republika
- Deutsch, Deutschland
- Español, España
- Português, Portugal
- English, Europe
- Français, France
- Italiano, Italia
- Magyar, Magyarország
- Nederlands, Nederland
- Deutsch, Österreich
- Polski, Polska
- Română, România
- Suisse / Schweiz / Svizzera
- Svenska, Sverige
- Suomeksi, Suomi
- Türkçe, Türkiye
- English, United Kingdom
- Slovenská, Slovak
-
Worldwide
- All Product Highlights
- CRYSTA-KM 565
- QM-Fit
- SmartMeasure-AL
- SJ-220
- QuantuMike
- LEGEX Takumi
- STRATO-Active Series
- Measurlink 10
- TAGLENS
- MCOSMOS 5
- Crysta Apex V
- FORMTRACER Avant
- MiSTAR 555
- Calipers
- Bluetooth Data Transmission
- QuickVision Pro
- All Products by Industry
- Aerospace
- Medical
- Automotive
- Energy
- Gen. Manufacturing
- Electronics
- Original Equipment Manufacturers (OEM)
- Case Studies
- All Small Tools
- Calipers
- Micrometers & Micrometer heads
- Inside Measuring Instruments
- Depth Measuring Instruments
- Height Gauges
- Indicators & Caliper Gauges
- Auxiliary Equipment and Miscellaneous
- Calibration Instruments
- Gauge Blocks
- All CMM
- Small & Medium sized CMMs
- In-line & Shopfloor CMMs
- Large sized CMMs
- CMM Rotary Tables
- Probes
- Styli
- Fixtures
- CMM Accessories
- CMM Software
- SmartMeasure-AL
- All Vision
- Manual 2D Vision Measuring Machine QM-Fit
- Manual 2D Vision Measuring Machines Quick Image
- Manual 3D Vision Systems
- 3D CNC Vision Systems
- 3D CNC Multi-sensor Vision Systems
- 3D CNC Micro Geometry Vision Systems
- Vision System Software
- Accessories for Vision Machines
- Vision System Fixtures
- Vision System Styli
- All Optical
- Magnifiers
- Measuring Projectors
- Measuring Microscopes
- Microscope Units
- TAGLENS
- Interferometer Units
- Objective Lenses
- M2 Software for Measuring Microscopes and Projectors
- Optical Measurement Fixtures
- All Hardness
- Softwares for Hardness Testing Machines
- Portable Hardness Testers
- Hardness Reference Materials and Indenters
- Rockwell Hardness Testing Machines
- Vickers Hardness Testing Machines
- Micro-Vickers Hardness Testing Machines
- All Sensors
- Linear Gauges
- Low Force Gauges
- Counters and Display Units
- Laser Scan Micrometers
- Surface Measure
- Sensor Management Software
- Micrometers & Micrometer heads
- Digital & Mechanical Micrometers
- Micrometer Accessories
- Micrometer Heads
- Micrometer Head Accessories
- Inside Measuring Instruments
- Inside Micrometers
- Bore Gauges
- Inside Micrometer & Bore Gauge Accessories
- Indicators & Caliper Gauges
- Digital Indicators
- Indicator Accessories
- Lever Indicators
- Dial Indicators
- Dial Test Indicators Accessories
- Thickness, Caliper & Tension Gauges
- Auxiliary Equipment and Miscellaneous
- Indicator Stands
- Precision Vices
- Plates and Granite Squares
- Angle Measurement and Squares
- Feeler Gauges, Rules, Knife Edges
- Gauge Blocks
- Steel Gauge Block Sets
- Steel Individual Gauge Blocks
- Ceramic Gauge Block Sets
- Ceramic Individual Gauge Blocks
- Special Gauge Blocks
- Gauge Block Accessories
- Accessories for Square Gauge Blocks
- Small & Medium sized CMMs
- CRYSTA-Apex V PLUS - 500, 700, & 900 Series
- CRYSTA-Apex V - 1200, 1600 & 2000 Series
- CRYSTA-Apex EX Series for REVO
- STRATO-Active Series
- STRATO-Apex - 500, 700, & 900 Series
- STRATO-Apex - 1600 Series
- LEGEX Series
- CRYSTA-KM 565
- Styli
- Styli Kits
- Straight Styli
- Diamond Coated Styli
- Solid Diamond Styli
- Master Ball
- Machine Tool Styli
- Star Styli
- Styli for Star Styli
- Styli for Clamping Holder
- Cylinder Styli
- Disk Styli
- Tip Styli
- Extensions
- Holders
- Adapters
- Joints
- Screws for Cubes
- Tools
- StyliCleaner
- Fixtures
- CMM Fixturing Kits
- Eco-fix Pallet Receiver System Kits
- FixtureBuilder Software
- Eco-fix and Eco-fixplus Extension Sets
- Eco-fix and Eco-fixplus Components
- Eco-fix Screws and Tools
- 3D CNC Vision Systems
- Quick Vision ACTIVE
- Quick Vision APEX / HYPER
- Quick Vision ACCEL
- Quick Vision ULTRA
- Accessories for Vision Machines
- Objective Lenses and Calibration Charts
- QV Index
- Accessories for TP-Retrofit
- Vision System Fixtures
- Optical Measurement Fixturing Kits
- Opti-fix Components
- Opti-fix Screws and Tools
- Vision System Styli
- Straight Styli
- Extension
- Star Styli
- Holders
- Styli for 5-way Styli
- Styli for Clamping Holder
- Adapters
- Joints
- Cylinder Styli
- Disk Styli
- Tip Styli
- Screw for Cube
- Tools
- Styli Kits
- Measuring Projectors
- PJ Series
- PV Series
- PH Series
- Data Processing Unit
- Accessories
- Accuracy Inspection Tools
- Measuring Microscopes
- TM Series Gen. B
- MF Series Gen. D
- MF-U Series Gen. D
- Optional Accessories for MF and MF-U Series
- Vision Unit
- QSPAK-VUE Software
- M3 Software for MF Series
- Microscope Cameras
- Objective Lenses
- ML-Series Objectives
- Brightfield Observation Objectives
- Brightfield/Darkfield Observation Objectives
- NIR Objectives
- NIR LCD Objectives
- NUV Objectives
- NUV LCD Objectives
- UV Objectives
- UV LCD Objectives
- Interferometer Objectives
- Optical Measurement Fixtures
- Optical Measurement Fixturing Kits
- Opti-fix Components
- Opti-fix Screws and Tools
- Surface Roughness
- Surftest SJ-220
- Surftest SJ-310
- Surftest SJ-410
- Surftest SJ-500
- Surftest SV-2100
- Surftest SJ-500P
- Surftest SV-2100P
- Formtracer Avant FTA-S3000
- Surftest Extreme SV-3000CNC
- Surftest Extreme SV-M3000CNC
- Surface Roughness & Contour
- Formtracer Avant FTA-D3000 / FTA-D4000 Series
- Formtracer Avant FTA-H3000
- Formtracer Extreme SV-C4500CNC
- Formtracer Extreme SV-C4500CNC HYBRID Type 1
- Formtracer Extreme CS-5000CNC and CS-H5000CNC
- Portable Hardness Testers
- Impact Type Hardness Testing Unit HARDMATIC HH-V400
- Digital and Analogue Durometers HARDMATIC HH-300
- Hardness Reference Materials and Indenters
- Hardness reference materials
- Hardness indenters and replacement balls
- Rockwell Hardness Testing Machines
- Manual Rockwell Hardness Testing Machines
- Semi-automatic Rockwell Hardness Testing Machines
- Automatic Rockwell Hardness Testing Machines
- Vickers Hardness Testing Machines
- Manual Vickers Hardness Testing Machines
- Semi-automatic Vickers Hardness Testing Machines
- Automatic Vickers Hardness Testing Machines
- Micro-Vickers Hardness Testing Machines
- Manual Micro-Vickers Hardness Testing Machines
- Semi-automatic Micro-Vickers Hardness Testing Machines
- Automatic Micro-Vickers Hardness Testing Machines
- Linear Gauges
- ABSOLUTE Digimatic Linear Gauge LGS Series
- Air Drive Unit
- Linear Gauge LG100 Series
- Linear Gauge LG200 Series
- Laser Hologauge
- Counters and Display Units
- EJ Counter and Interfaces for Linear Gauges
- EC Counter for Linear Gauges
- EG Counter for Linear Gauges
- EH Counter for Linear Gauges
- EV Counter for Linear Gauges
- Display Unit for EV Counter
- Laser Scan Micrometers
- Laser Scan Micrometer Measuring Unit
- Laser Scan Micrometer Controller Unit
- Laser Scan Micrometer Interface Unit
- Laser Scan Micrometer Optional Accessories
- DRO Linear Scales and Counters
- DRO Linear Scales AT103
- DRO Linear Scales AT103 - High Accuracy
- DRO Linear Scales AT113
- DRO Linear Scales AT113 - High Accuracy
- DRO ABS Linear Scales AT715
- Universal DRO KA-200 Counter
- NC Linear Scales
- NC Linear Scales ST36
- NC Linear Scales ST46-EZA
- NC Linear Scales ABS ST700
- NC Linear Scales ABS ST1300
- NC Linear Scales AT211
- NC Linear Scales ABS AT1100
- NC Linear Scales ABS AT1300
- Scale Units
- Horizontal ABSOLUTE Scale Coolant Proof IP66
- Horizontal ABSOLUTE Scale Standard
- Horizontal ABSOLUTE Scale Measurement Direction Switching
- Horizontal ABSOLUTE Scale Diameter Function
- Vertical ABSOLUTE Scale Standard
- Vertical ABSOLUTE Scale Measurement Direction Switching
- Vertical ABSOLUTE Scale Diameter Function
- Signal Cables
- USB Input Tool Direct (Digimatic-USB Cable)
- Digimatic Data Cables
- Digimatic Extension Cables
- Wireless Communication
- Wireless Communication System U-WAVE
- U-WAVE Bluetooth
- U-WAVE-T Connection Cables and Connection Units
- Interfaces
- USB Input Tool
- DMT-3T / FS2 USB
- DMX-1
- DMX-1 USB
- DMX-2 S
- DMX-2 USB
- DMX-3 USB
- MUX-10F
- DMX-8/2
- DMX-16 / DMX-16C
- DMX-0-1 USB / DMX-3-2 USB
 Aerospace
Complex aerospace applications need fast, extremely precise quality control to ensure accurate assemblies. See how Mitutoyo makes it happen
 Automotive
The automotive industry continues to innovate, and Mitutoyo delivers the advanced inspection and scanning capabilities to help manufacturers achieve ongoing production
 Energy
Mitutoyo’s measurement and analysis solutions are designed to help energy providers improve reliability and increase equipment uptime.
 Medical
To protect patient well-being, medical applications require exceptional accuracy. See how extensively tested solutions from Mitutoyo can help you achieve it.
 Gen. Manufacturing
Ensure high repeatability and rigorous quality control with form measurement solutions, coordinate measuring machines and precision measuring tools from Mitutoyo.
 Electronics
The non-contact and vision measurement solutions from Mitutoyo bring microscopic accuracy to smaller and denser electronic components
 Original Equipment Manufacturers (OEM)
Mitutoyo OEM can address missing expertise or resources by supplying you with our renowned Metrology equipment that seamlessly integrates into your products.
 Case Studies
For an overview of Mitutoyo's capabilities, this is no greater place to look than our marvelous collection of case studies.
 Mitutoyo Japan Desk
The first stop for Japanese companies operating in Europe
 Custom Products
Custom-made products for unique applications
 Manufacturing Automation Integration
Turn your factory into a smart factory with the help of Mitutoyo
 Mitutoyo Integrators
Integrating your measuring devices into existing processes made easy
 Repairs & Spare Parts
Spare parts and repairs for Mitutoyo devices
 Calibration
Get your measuring devices calibrated by a lab you trust
 Field Services
On-site service of your favorite measurement and testing machines
 Measurement Services
Get your workpieces and parts measured from anywhere in Europe
 Metrology and Product Training
The quickest way to get support or training
 Product Demos
Online or offline, get a product demonstration today
 IT Support
Perfect and hassle-free installation and integration into your IT infrastructure.
 Education Pack
Perfect for the workshop or classroom, there is no greater help than posters or learning material from Mitutoyo
 E-Learning
For those interested in metrology, Mitutoyo offers E-Learning courses to help train students, staff, or even hobbyists
 Online Material
If you're looking for a quick way to learn more about measurement, check out our many instructional videos.
 Webinars
Explore our free webinars on measurement technology, best practices, and industry trends
 Discover Mitutoyo
Unmatched expertise in measurement
 Mitutoyo Partners
Find out here who our Dealer Partners in Europe are
 Certifications & Legitimacy
Here you can explore our certifications, accreditations and legitimacy to ensure trusted and verified services
 Career
Learn more about how it feels to work at Mitutoyo and the next steps toward starting your career here
 Merchandising
The popular destination for high-quality Mitutoyo apparel and more!
 Sustainability Overview
Find out more about Mitutoyo's contribution towards Sustainability
 Leaflets
Discover our product brochures and download them
 Declarations of Conformity
Here you can download the full versions for the EU and the UK
 Free Wallpapers
Download official Mitutoyo wallpapers here for free
 Mitutoyo Brand Communication Materials
Resources for Mitutoyo staff and external suppliers
 Online Catalog
View our extensive product range in our online catalog!
-
Products
- Back Products
- Products
- Product Highlights
- Products by Industry
-
Small Tools
- Back Small Tools All Small Tools
- Calipers
-
Micrometers & Micrometer heads
- Back Micrometers & Micrometer heads Micrometers & Micrometer heads
- Digital & Mechanical Micrometers
- Micrometer Accessories
- Micrometer Heads
- Micrometer Head Accessories
-
Inside Measuring Instruments
- Back Inside Measuring Instruments Inside Measuring Instruments
- Inside Micrometers
- Bore Gauges
- Inside Micrometer & Bore Gauge Accessories
-
Depth Measuring Instruments
- Back Depth Measuring Instruments Depth Measuring Instruments
- Depth Micrometers
- Depth Calipers & Gauges
- Depth Caliper Accessories
- Height Gauges
- Indicators & Caliper Gauges
-
Auxiliary Equipment and Miscellaneous
- Back Auxiliary Equipment and Miscellaneous Auxiliary Equipment and Miscellaneous
- Indicator Stands
- Precision Vices
- Plates and Granite Squares
- Angle Measurement and Squares
- Feeler Gauges, Rules, Knife Edges
-
Calibration Instruments
- Back Calibration Instruments Calibration Instruments
- Height Masters
- Check Masters
- Calibration Tools
- Gauge Blocks
-
CMM
- Back CMM All CMM
- Small & Medium sized CMMs
-
In-line & Shopfloor CMMs
- Back In-line & Shopfloor CMMs In-line & Shopfloor CMMs
- MACH Ko-ga-me
- MACH 3A 653
- MACH V 9106
- MiSTAR
-
Large sized CMMs
- Back Large sized CMMs Large sized CMMs
- STRATO Apex G
- CARB-Series
-
CMM Rotary Tables
- Back CMM Rotary Tables CMM Rotary Tables
- MRT240 Rotary Table
- MRT320 Rotary Table
- Probes
- Styli
- Fixtures
-
CMM Accessories
- Back CMM Accessories CMM Accessories
- Enclosures
- Security System
-
CMM Software
- Back CMM Software CMM Software
- MiCAT Planner
- MCOSMOS
- MAFIS Express
- MSURF
- GEARPAK EXPRESS
- SmartMeasure-AL
-
Vision
- Back Vision All Vision
- Manual 2D Vision Measuring Machine QM-Fit
-
Manual 2D Vision Measuring Machines Quick Image
- Back Manual 2D Vision Measuring Machines Quick Image Manual 2D Vision Measuring Machines Quick Image
- Quick Image
- Quick Image Software
-
Manual 3D Vision Systems
- Back Manual 3D Vision Systems Manual 3D Vision Systems
- Manual Quick Scope
- Quick Scope Software
-
3D CNC Vision Systems
- Back 3D CNC Vision Systems 3D CNC Vision Systems
- Quick Vision ACTIVE
- Quick Vision APEX / HYPER
- Quick Vision ACCEL
- Quick Vision ULTRA
-
3D CNC Multi-sensor Vision Systems
- Back 3D CNC Multi-sensor Vision Systems 3D CNC Multi-sensor Vision Systems
- Quick Vision Hybrid
- Quick Vision WLI
-
3D CNC Micro Geometry Vision Systems
- Back 3D CNC Micro Geometry Vision Systems 3D CNC Micro Geometry Vision Systems
- UMAP Vision Systems
- UMAP Software
-
Vision System Software
- Back Vision System Software Vision System Software
- QVPAK
- QSPAK
- QIPAK
-
Accessories for Vision Machines
- Back Accessories for Vision Machines Accessories for Vision Machines
- Objective Lenses and Calibration Charts
- QV Index
- Accessories for TP-Retrofit
-
Vision System Fixtures
- Back Vision System Fixtures Vision System Fixtures
- Optical Measurement Fixturing Kits
- Opti-fix Components
- Opti-fix Screws and Tools
- Vision System Styli
-
Optical
- Back Optical All Optical
-
Magnifiers
- Back Magnifiers Magnifiers
- Clear Loupes
-
Measuring Projectors
- Back Measuring Projectors Measuring Projectors
- PJ Series
- PV Series
- PH Series
- Data Processing Unit
- Accessories
- Accuracy Inspection Tools
- Measuring Microscopes
-
Microscope Units
- Back Microscope Units Microscope Units
- Microscope Unit FS70 Series
- Video Microscope Unit VMU Series
- TAGLENS
- Interferometer Units
- Objective Lenses
- M2 Software for Measuring Microscopes and Projectors
-
Optical Measurement Fixtures
- Back Optical Measurement Fixtures Optical Measurement Fixtures
- Optical Measurement Fixturing Kits
- Opti-fix Components
- Opti-fix Screws and Tools
-
Form
- Back Form All Form
- Surface Roughness
- Contour
- Surface Roughness & Contour
-
Form
- Back Form Form
- Roundtest
- Roundtracer
-
FMI Software
- Back FMI Software FMI Software
- Formtracepak
- Roundpak
- MCube Map V9
-
Fixtures
- Back Fixtures Fixtures
- Eco-fix FMI Kits
- PinFlex System
-
Hardness
- Back Hardness All Hardness
-
Softwares for Hardness Testing Machines
- Back Softwares for Hardness Testing Machines Softwares for Hardness Testing Machines
- AVPAK
- Portable Hardness Testers
-
Hardness Reference Materials and Indenters
- Back Hardness Reference Materials and Indenters Hardness Reference Materials and Indenters
- Hardness reference materials
- Hardness indenters and replacement balls
- Rockwell Hardness Testing Machines
- Vickers Hardness Testing Machines
- Micro-Vickers Hardness Testing Machines
- Sensors
-
Digital Scales
- Back Digital Scales All Digital Scales
- DRO Linear Scales and Counters
- NC Linear Scales
-
Scale Units
- Back Scale Units Scale Units
- Horizontal ABSOLUTE Scale Coolant Proof IP66
- Horizontal ABSOLUTE Scale Standard
- Horizontal ABSOLUTE Scale Measurement Direction Switching
- Horizontal ABSOLUTE Scale Diameter Function
- Vertical ABSOLUTE Scale Standard
- Vertical ABSOLUTE Scale Measurement Direction Switching
- Vertical ABSOLUTE Scale Diameter Function
-
Data Management
- Back Data Management All Data Management
-
Data Management Software
- Back Data Management Software Data Management Software
- MeasurLink 10
- USB-ITPAK
-
Mini Processors
- Back Mini Processors Mini Processors
- Digimatic Mini Processor DP-1VA LOGGER
- Signal Cables
- Wireless Communication
- Interfaces
-
Timerbox, Digimatic Switch Box
- Back Timerbox, Digimatic Switch Box Timerbox, Digimatic Switch Box
- Digimatic Timerbox
- Digimatic Switch Box
-
Software
- Back Software All Software
-
CMM Software
- Back CMM Software CMM Software
- MiCAT Planner
- MCOSMOS
- MAFIS-Express
- MSURF
- GEARPAK EXPRESS
-
Vision System Software
- Back Vision System Software Vision System Software
- QVPAK
- QSPAK
- QIPAK
- M3 Software for Quick Image
-
Optical System Software
- Back Optical System Software Optical System Software
- M2 Software for Microscopes and Projectors
- M3 Software for MF Microscopes
- QSPAK-VUE
-
FMI Software
- Back FMI Software FMI Software
- Formtracepak
- Roundpak
- MCube Map V9
- Hardness Testing Software
- Sensor Management Software
-
Data Management Software
- Back Data Management Software Data Management Software
- Measurlink 10
- USB-ITPAK
- Automated Measuring Devices
- Computed Tomography Systems
- Industries
-
Services
- Back Services
- Services
- Mitutoyo Japan Desk
-
Smart Factory Solutions
- Back Smart Factory Solutions
- Smart Factory Solutions
- Custom Products
- Manufacturing Automation Integration
- Mitutoyo Integrators
- Repairs & Spare Parts
- Calibration
- Field Services
- Measurement Services
- Metrology and Product Training
- Product Demos
- IT Support
-
Education
- Back Education
- Education
- Education Pack
- E-Learning
- Online Material
- Webinars
-
About us
- Back About us
- About us
-
Discover Mitutoyo
- Back Discover Mitutoyo
- Discover Mitutoyo
-
Mitutoyo History
- Back Mitutoyo History
- Mitutoyo History
- Name & Philosophy
- Mitutoyo Corporation
- Mitutoyo in Europe
- Brand
-
Mitutoyo Partners
- Back Mitutoyo Partners
- Mitutoyo Partners
- Mitutoyo Spain
- Mitutoyo Portugal
- Mitutoyo Turkey
-
Certifications & Legitimacy
- Back Certifications & Legitimacy
- Certifications & Legitimacy
- Certifications & Accreditations
- Products Legitimacy (FAKE)
-
Career
- Back Career
- Career
- Mitutoyo Trainee Program
- Merchandising
- Sustainability Overview
-
News
- Back News
- News
- Events
-
Special Promotions
- Back Special Promotions
- Special Promotions
- Press Area
- Downloads
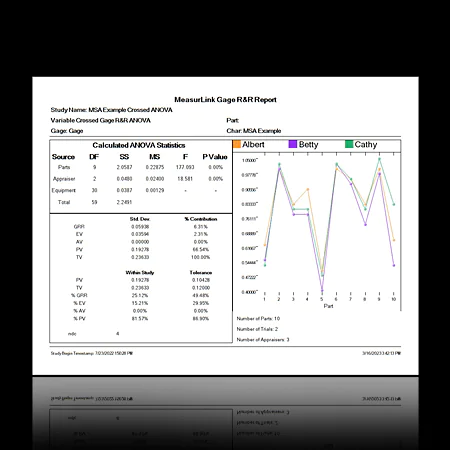
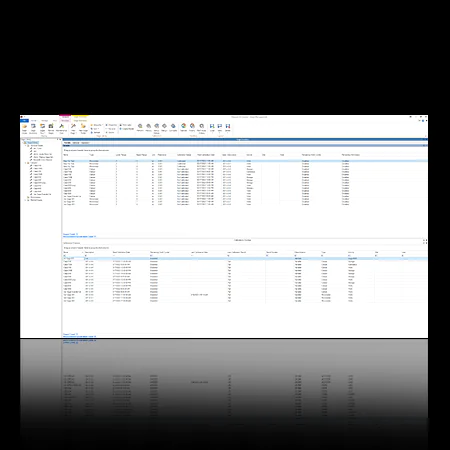
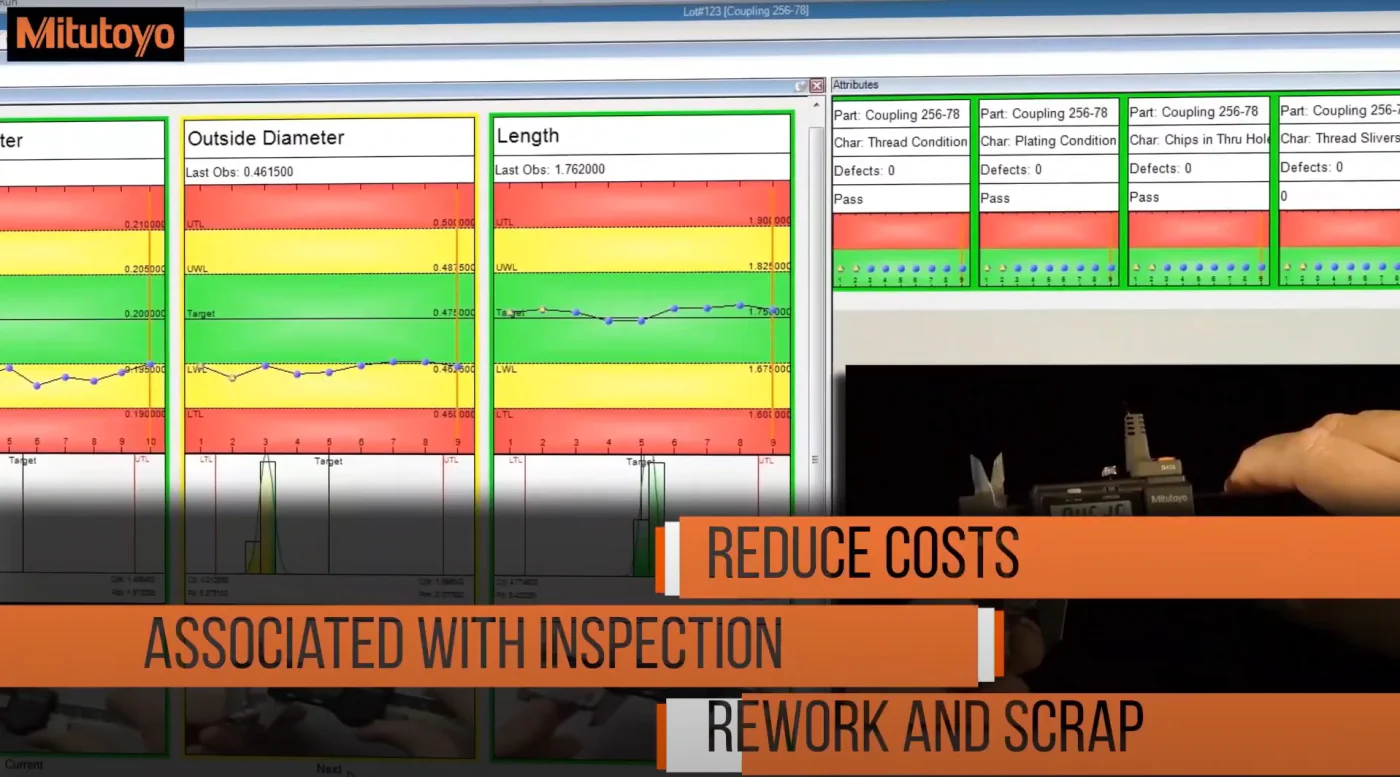
MeasurLink combines Real Time on-line data collection with Real Time SPC charts and analysis for operators and real-time Quality Control/Supervisor Reports and Alerts for your entire manufacturing system. MeasurLink is designed for integrated networks to create a quality information-sharing system which includes a comprehensive metrology solution for your company.
![]()
Reduce costs associated with inspection, reworking, and scrapping
![]()
Ensure part quality
and consistency
![]()
Increase data visibility
and accessibility
![]()
Increase ease of use for inspectors
in all environments
![]()
Reduce manufacturing defects through the use of real-time SPC
MeasurLink® 10 is now available with more ways to make measurement data analysis easier, inspection more efficient, and better ways to find and eliminate sources of variation!
What's New
MeasurLink 10 builds on the existing architecture of MeasurLink 9,
which enjoyed record-setting license usage over the course of its life as the current version!
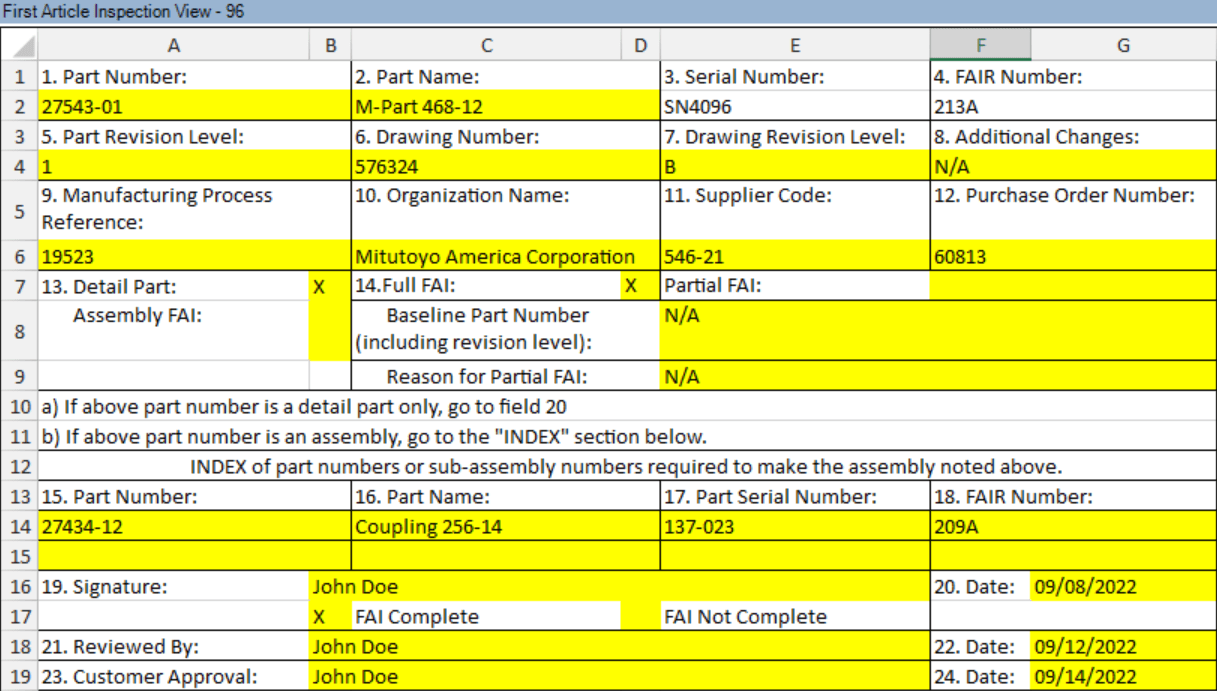
> AS9102 First Article Inspection
Provide a clear and concise approach for completing First Article Inspection Reports before the manufacturing process. Includes forms 1, 2, and 3. Export to Excel or PDF.
Real-Time New Product Features
>When the module is closed and runs are still active, the user will be given the option to save the layout for all active runs at the same time, rather than being asked individually for each run. This allows the module to be closed more quickly and efficiently.
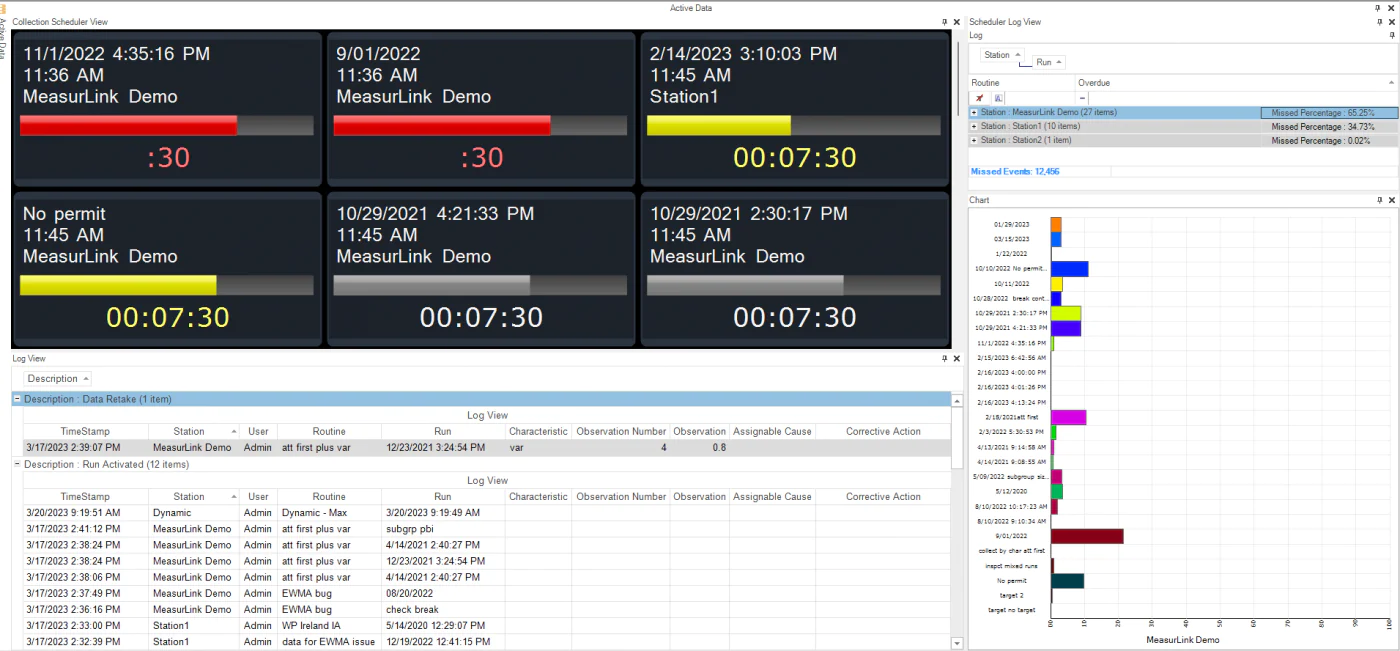
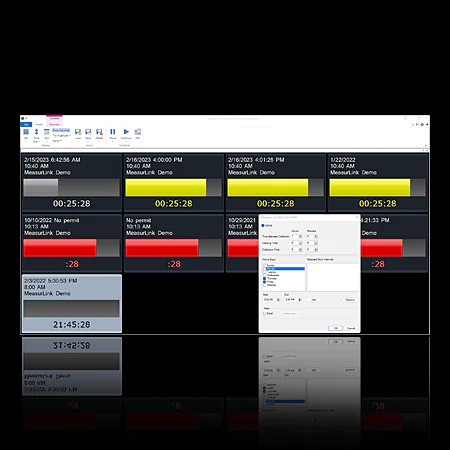
>Collection Scheduler is included with the Real-Time edition and no longer requires a license. Missed data collection analytics are available in Process Manager.
>AS9102 First Article Inspection Reports (FAIR) are now available as a form to populate and print. This includes setup, data collection, and reporting using Forms 1, 2, and 3.
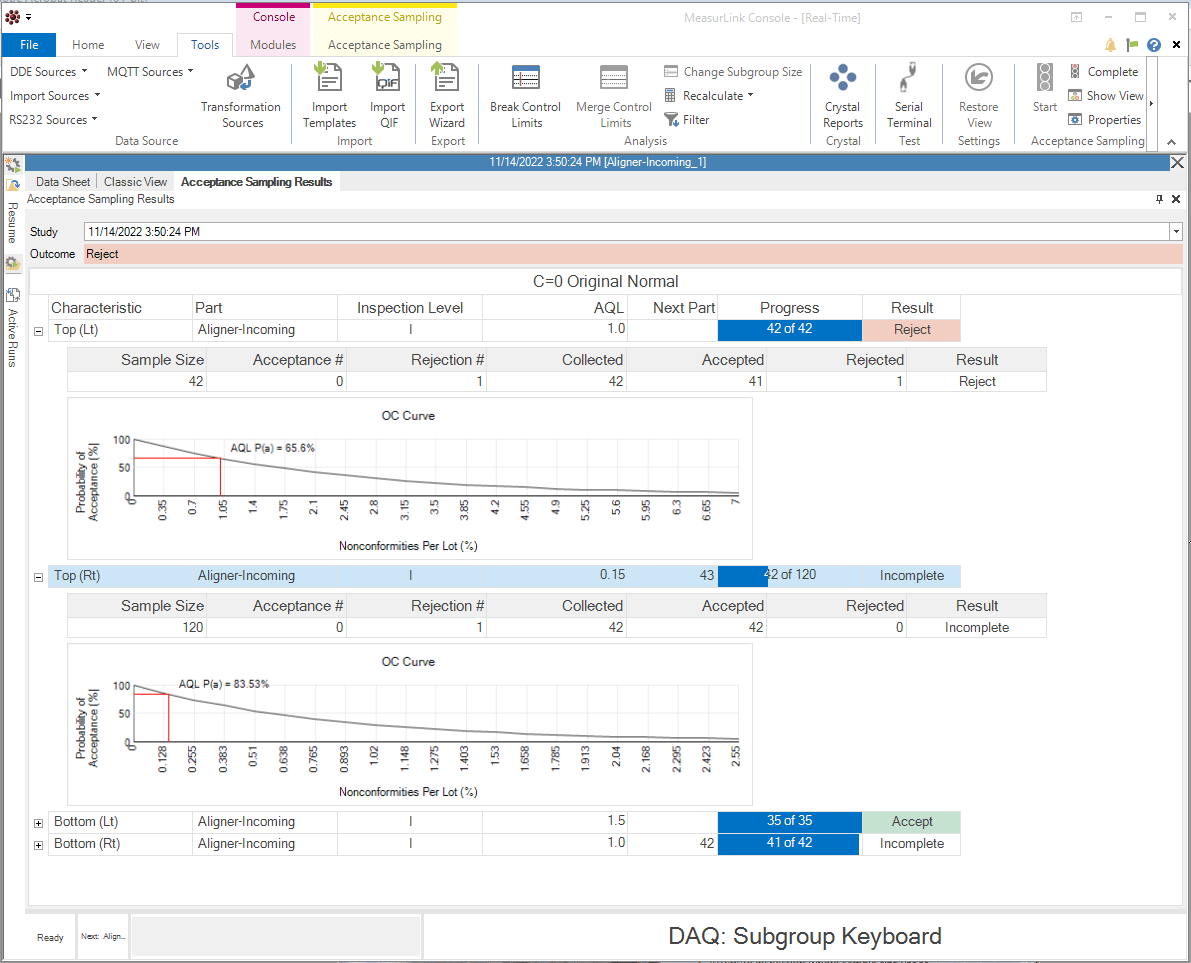
>Acceptance Sampling support for C=0 or Z1.4 guidelines to determine inspection quantities and results to determine whether to accept or reject the entire material lot. Displays OC Curves for risk evaluation. Export to Excel or PDF.
>A single point of data can be removed from the middle of a run in either Real-Time or Process Analyzer. Tagged data will be removed or adjusted to the new data order based on the properties of that tag, and statistics will be updated at the time the deletion occurs. Note that this deletion is a permanent, unrecoverable removal of data from the database.
> Missed Inspection View and Metrics
View metrics based on run, routine, station, and time for missed data collections using Process Manager.
Process Analyzer New Product Features
>Box Plot analysis capabilities have been added to the Capability View.
>Acceptance sampling for C=0 and Z1.4 standards on historical data.
>Support for AS9102 First Article Inspection Reports – viewing, printing, editing, export to Excel or PDF.
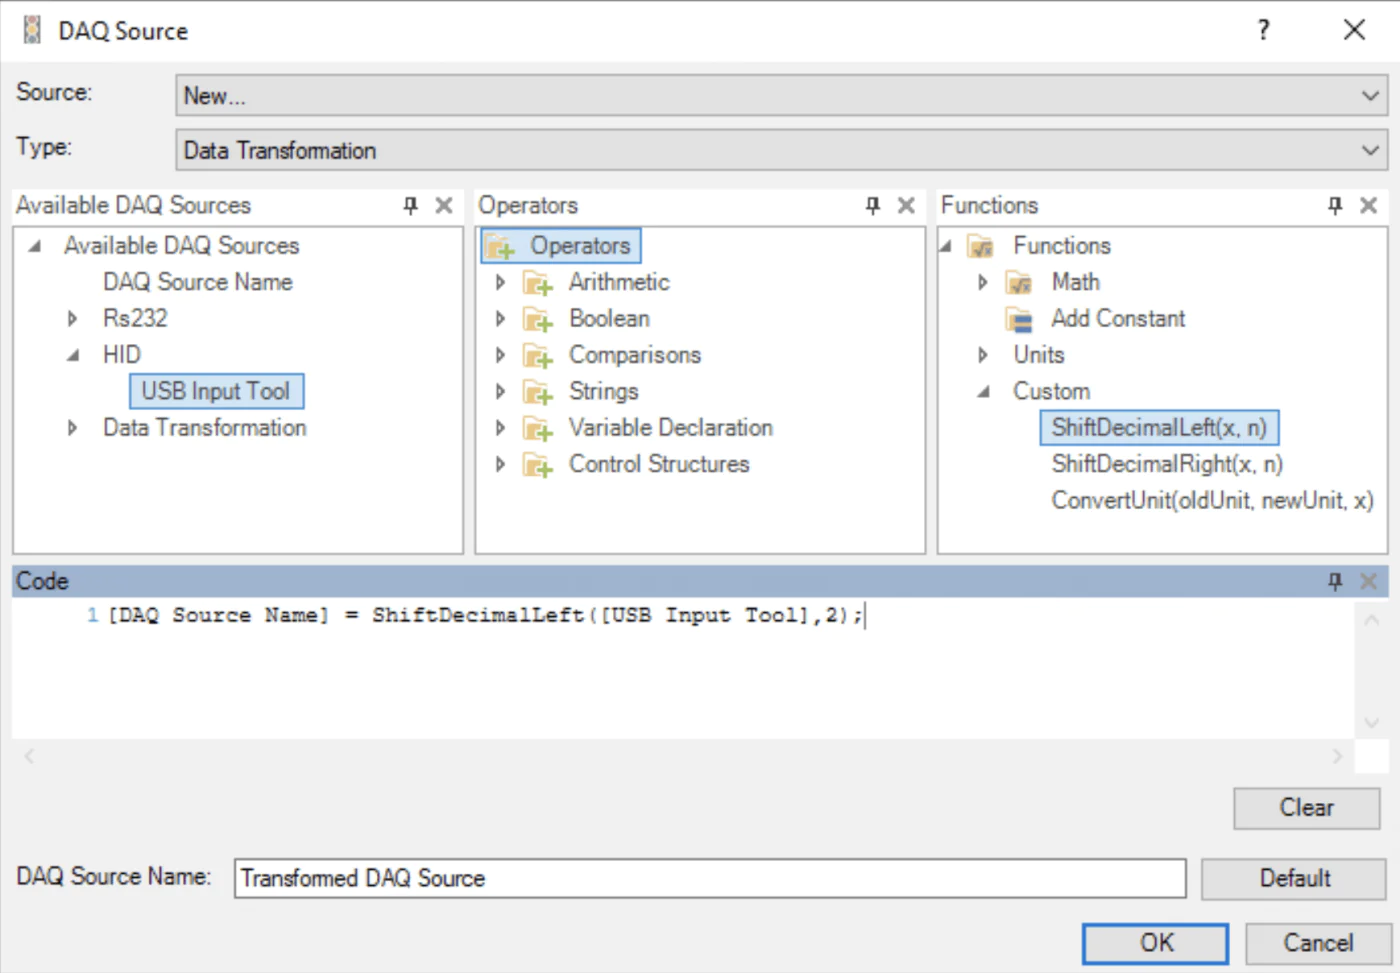
> Data Transformation
Transform data from measurement sources before storing and displaying results. This function can convert units and shift decimal points to make data collection even easier.
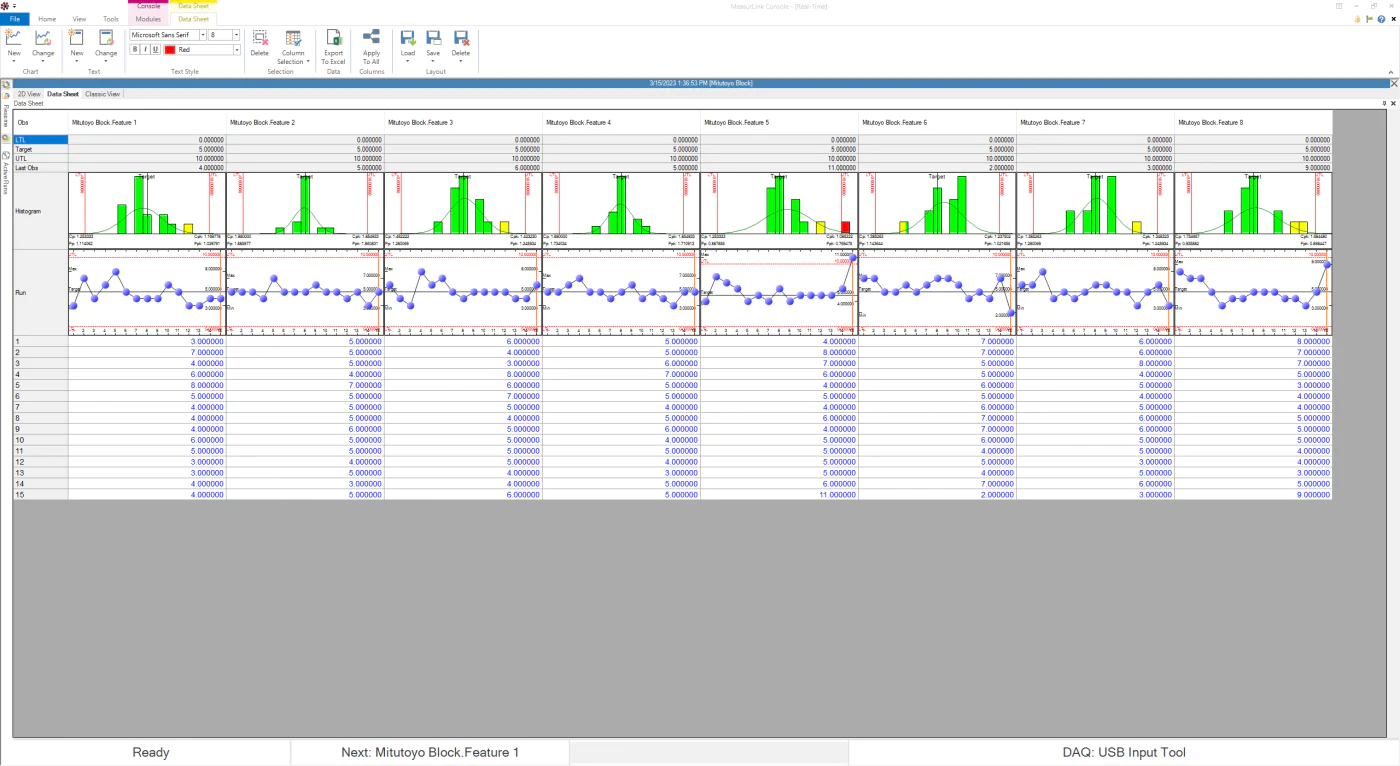
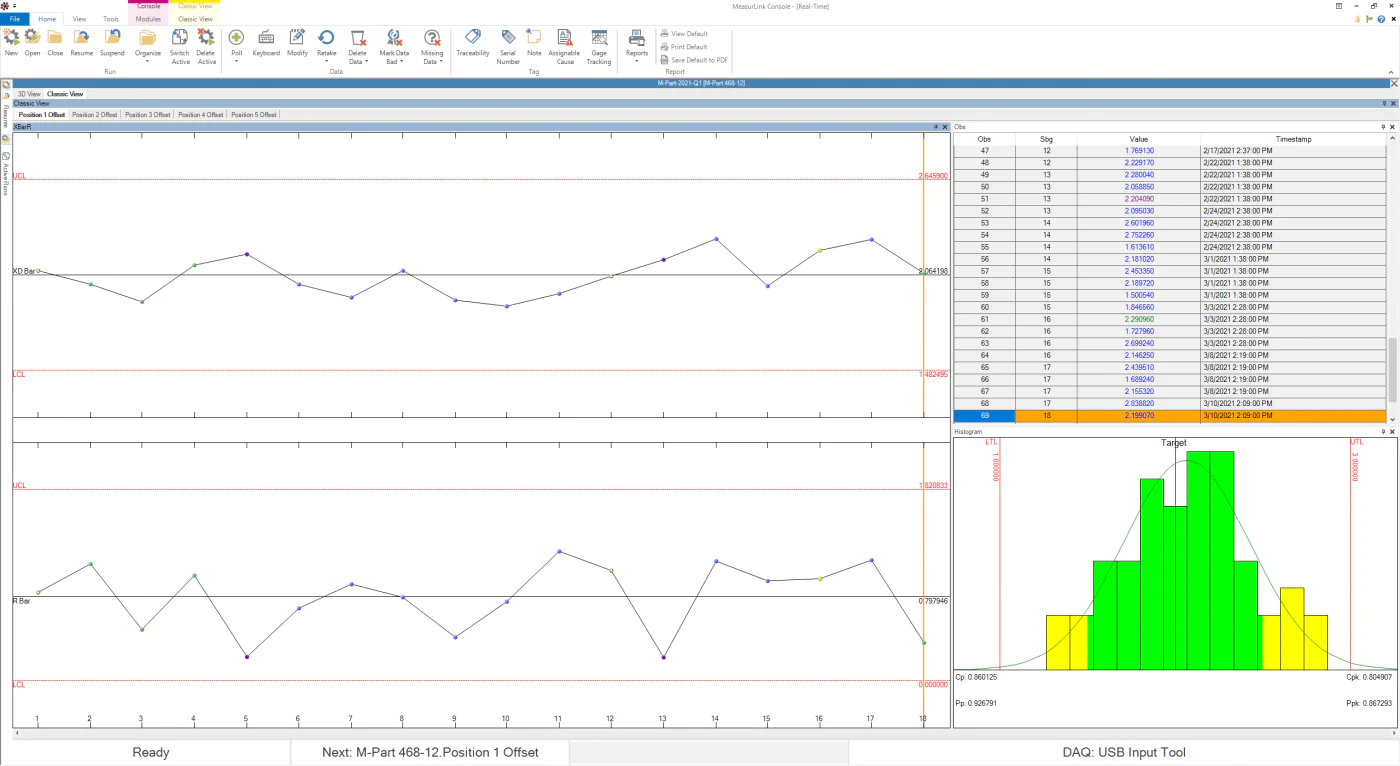
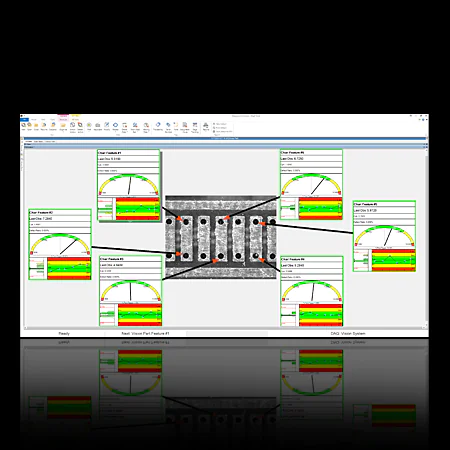
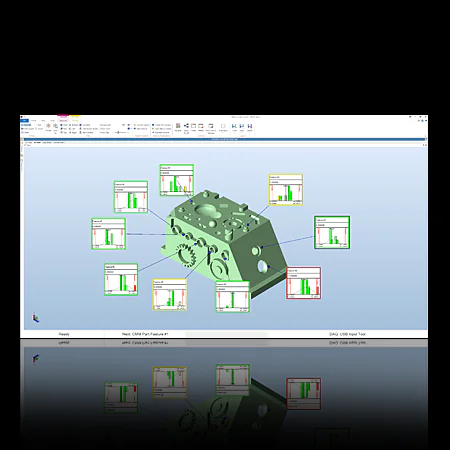
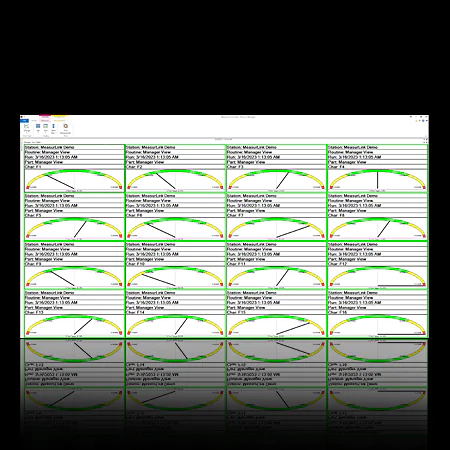
Designed to collect data at the point of manufacture, operators can be alerted of trends, cycles, and nonconformance as soon as they occur. A customizable user interface allows the user nearly infinite ways to view information specific to that process. MeasurLink Real-Time has the ability to connect and acquire data from virtually any measuring device. It supports the full range of metrology technology, including calipers, micrometers, indicators, CMMs, vision systems, and more.
Real-Time Standard - Features & Benefits
>User Friendly
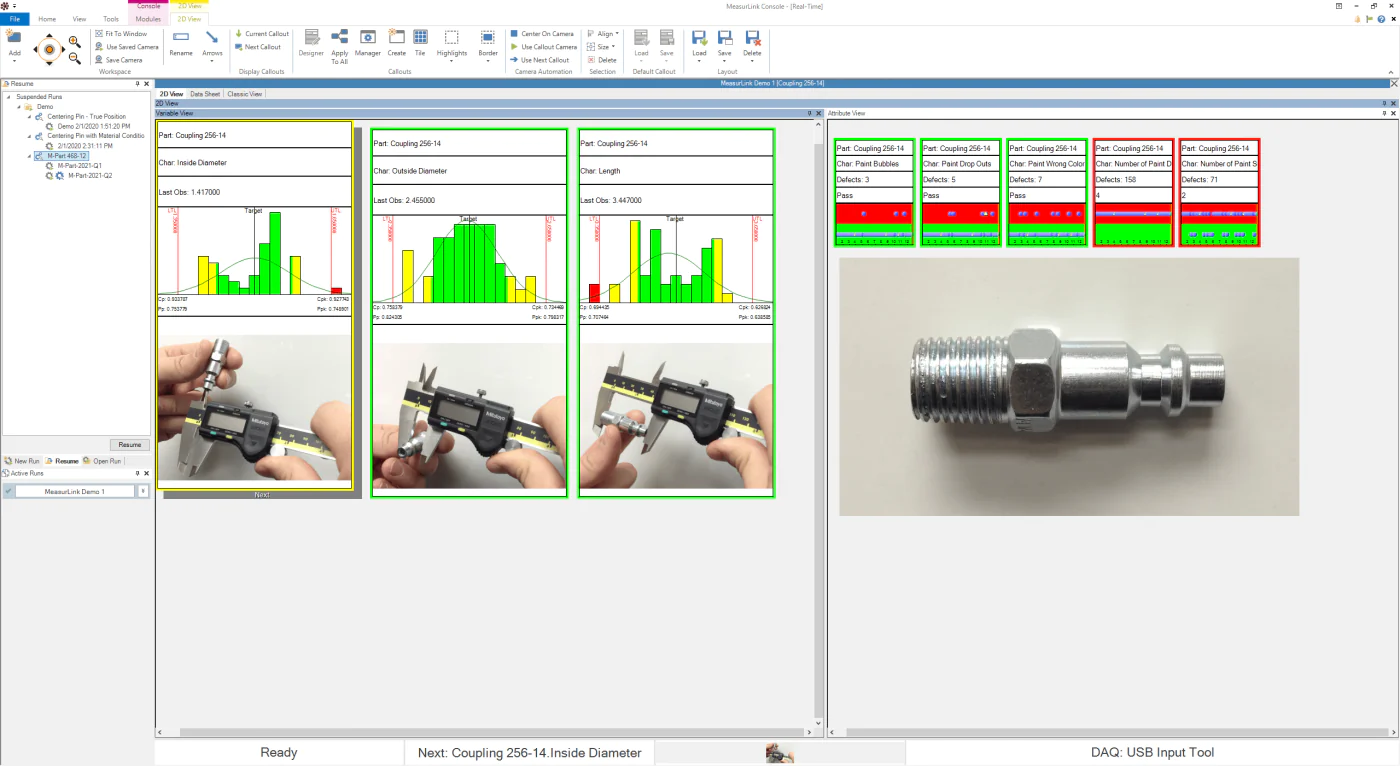
Click a gauge button and watch the charts update in real time. This helps the operator stay on top of the process. Begin collecting data in minutes with the newly designed Inspection Wizard.
>Part Pictures
View scanned blueprints, and digital photographs at a glance. On-screen guided sequencing keeps the operator moving to the right feature.
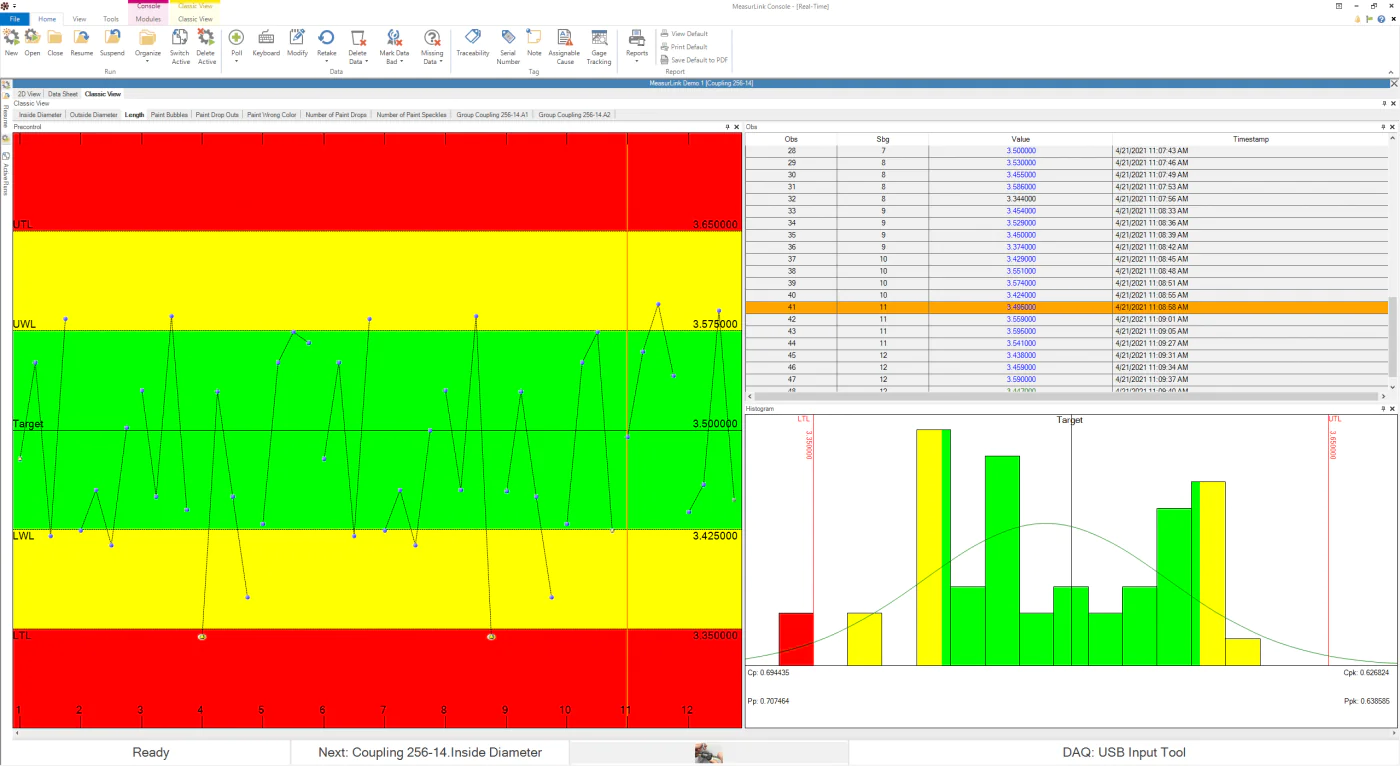
>Comprehensive SPC
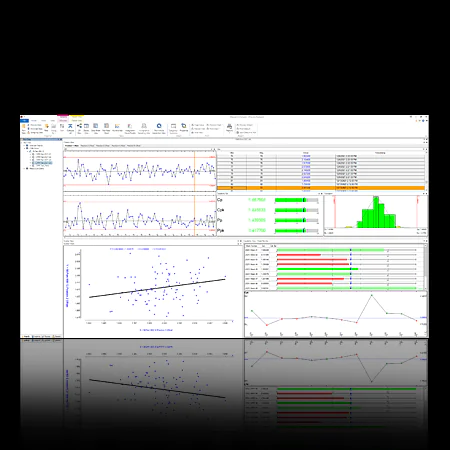
Easy-to-use Control Charts, Histograms, Capability, Detailed statistics, Assignable Causes, Corrective Actions, and Traceability all make this software “best in class”.
>Variable Collection Frequency
Allows characteristics of the same routine to be measured at different intervals while maintaining appropriate prompted guided sequencing.
>Multimedia Aids
Attach movies (AVI, MOV, MPG), sound (WAV), and images (BMP, JPG, TIF) to parts, routines, or individual characteristics as instructional aides for an operator.
>Revision History
Track specification adjustments and preserve historical data.
>Data Acquisition and Input
Collects data from digital micrometers, calipers, indicators, bore gauges, etc. The keyboard entry is a snap making it possible to collect data for one or even a million parts. Begin collecting data in 60 seconds with a “Quick Run” by defining features, tolerances, and input methods. There is also flexible data input by collecting data by feature, part, etc.
>Variable and/or Attribute Data
Collect dimensional data (length, width, height, outside diameter, inside diameter weight, etc.). Supports derived features (calculations for run out, volume, true position, etc.).
Mix your dimensions and non-conformance in the same Inspection Routine. Track defects and defectives along with your dimensional data. Collect data from visual inspections (burrs, cracks, dents, missing holes, etc.) to determine the fitness of a part.
Track failures using a go/no-go style or count the defects on a characteristic to determine if a part is defective. There is complete flexibility to study the characteristics individually and in groups.
>Crystal and Flexible Reporting
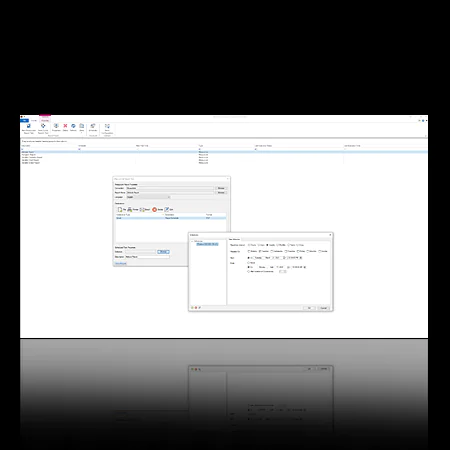
Create your own customized Crystal Reports for use with Part or Run data.
Build report templates with company logos and free-form text. Users can also select and position chart types to customer specifications.
>Engineering Specifications
Attach drawings to parts, routines, or individual characteristics for viewing.
Most file formats are supported as an attachment (e.g. Word, PDF).
>Data Tests
Full support of Western Electric and Nelson Tests for pattern recognition in control charts (e.g. extreme point, trend, stratification, oscillation, etc.)
along with various alerts for each failed test.
>Time-Stamped Data
All observation data is marked with the date and time from the computer clock.
>Corrective Plans
Operators choose corrective action as applied to the part or process.
Multiple corrective actions can be applied to any subgroup. Empower the operator to build on the existing Corrective Action list.
>Forced Assignable Cause
Force Assignable Cause Tags are possible during collection if the process is out of control. Empowering the operator to build on the existing pick list.
> Acceptance Sampling
MeasurLink's Acceptance Sampling feature calculates the correct number of samples to take and will reject or accept lots based on C=0 or ANSI Z1.4 standards. OC Curves can be displayed for risk evaluation with the possibility to export to Excel or PDF.
Acceptance Sampling New Product Features
>In Routine Library, runs can now be created at other stations than the user is currently on, eliminating the requirement for a setup person to be at the station to create a run.
>A new property for Criticality has been added to the revision level of a characteristic in the Part Library. This will support functionality for processes such as acceptance sampling.
>In Station Library, a DAQ source can be enhanced to apply an equation to the data to “transform” it into more usable data within MeasurLink. This transformed DAQ source will allow for simpler handling of unit conversions, addition or shifting of decimal places, and can perform similar functions as derived characteristics, such as conditionally calling external programs. Common transformation functions have been built into Station Library for users to take advantage of, including functions to shift decimal positions left or right and convert units using the long-standing Unit Manager function of the Support Center.
>Usability improvements to the libraries were implemented to make options easier to find and use.
> Dynamic Run Selection
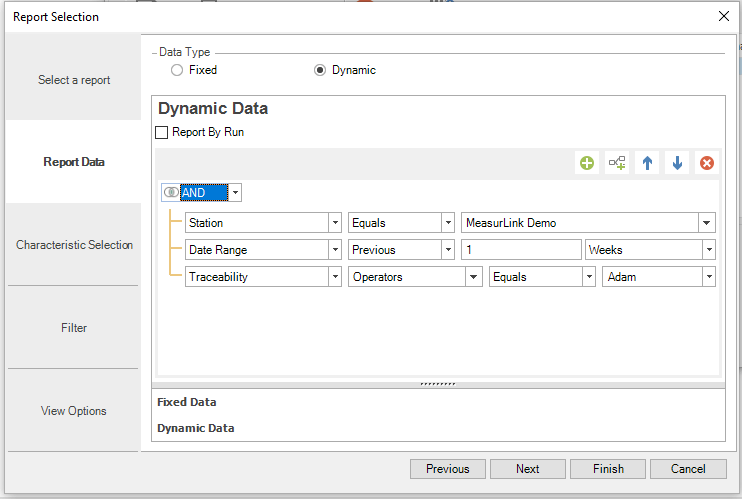
This supports functionality for enhanced reporting. It gives users the ability to report on multiple runs across separate stations, parts, and routines based on filter criteria. Output all runs matching filter criteria to a single report, or an individual report for each run.
Dynamic Run Selection - New Product Features
>The MeasurLink user experience has undergone an update in visual presentation. Icons, window themes, and workspaces have been modified to provide a flatter feel, utilizing fewer but more consistent colors throughout. Additionally, chart backgrounds, plot points, and histogram bins have changed the default color scheme to remove the previous gradient.
>Support has been added for acceptance sampling methods of data collection. Standard AQL methods supported are C=0 (Squeglia) and ANSI Z1.4. The module will allow for runs that are specific to SPC or acceptance sampling, or they can be combined to use the same data within a run for both purposes. Users can also leverage historical data to create sample studies.
>Support has been added for AS9102 First Article Inspection methodologies. This includes setup, data collection, and reporting using the standard form.
>Active Input device commands can now be sent to MeasurLink from HID devices, such as using a barcode scanner to open an inspection routine.
>When the database version upgrade dialog displays, primarily after a service pack has been applied, the user now has the option to change the connection so as to avoid updating a database that should not be updated (for example, to allow switching from production to a test or QA database).
>The concept of run type has been added with values of SPC run (this is the run structure of previous versions of MeasurLink), First Article Inspection Results, Acceptance Sample, or a combination of the three. Specific icons have been added for each run type, and appropriate trees can be grouped by this new type as well.
>Support has been added for the MQTT data transfer protocol (input only).
>More robust filtering of trees in the Report Scheduler, Process Analyzer, and Process Manager has been included. A more advanced user experience provides the ability to achieve more complex and granular tree displays, making it easier to identify and work with only the desired data. Filter criteria include multiple logical operands, more filtering types, and grouping controls to allow for advanced order of operations. Filters can be inclusive or exclusive.
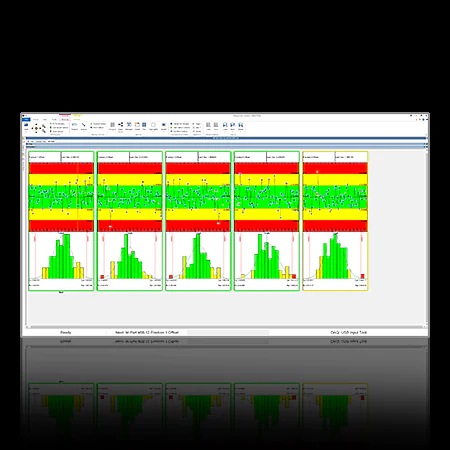
>XBar/R and XBar/S charts can be converted to “rainbow” charts by including the sigma zone lines and optionally adding a color scheme within the zones.
>A new report page for displaying the electronic signature history of a run has been added to the Characteristic Independent section of MeasurLink reports.
>When previewing or printing a chart in Probability View or Classic View that contains filtered data, the filter criteria are displayed at the top of the chart.
> MQTT JSON Device
Supports machine-to-machine communication protocol for industrial automation. Similar to RS-232 devices, the measurement, traceability, and serial number can be collected.
MeasurLink General Features & Enhancements
>The MeasurLink user experience has undergone an update in visual presentation. Icons, window themes, and workspaces have been modified to provide a flatter feel to the UI, utilizing fewer but more consistent colors throughout. Additionally, chart backgrounds, plot points, and histogram bins have changed the default color scheme to remove the previous gradient.
>Support has been added for acceptance sampling methods of data collection. Standard AQL methods supported are C=0 (Squeglia) and ANSI Z1.4. The module will allow for runs that are specific to SPC or acceptance sampling, or they can be combined to use the same data within a run for both purposes. Users can also leverage historical data to create sample studies.
>Support has been added for AS9102 First Article Inspection methodologies. This includes setup, data collection, and reporting using the standard form.
>Active Input device commands can now be sent to MeasurLink from HID devices, such as using a barcode scanner to open an inspection routine.
>When the database version upgrade dialog displays, primarily after a service pack has been applied, the user now has the option to change the connection so as to avoid updating a database that should not be updated (for example, to allow switching from production to a test or QA database).
>The concept of run type has been added with values of SPC run (this is the run structure of previous versions of MeasurLink), First Article Inspection Results, Acceptance Sample, or a mixed type (combination of the first three). Specific icons have been added for each run type, and appropriate trees can be grouped by this new type as well.
>Support has been added for the MQTT data transfer protocol (input only).
>More robust filtering of trees in the Report Scheduler, Process Analyzer, and Process Manager has been included. A more advanced user experience provides the ability to achieve more complex and granular tree displays, making it easier to identify and work with only the desired data. Filter criteria include multiple logical operands, more filtering types, and grouping controls to allow for advanced order of operations. Filters can be inclusive or exclusive.
>XBar/R and XBar/S charts can be converted to “rainbow” charts by including the sigma zone lines and optionally adding a color scheme within the zones.
>A new report page for displaying the electronic signature history of a run has been added to the Characteristic Independent section of MeasurLink reports.
>When previewing or printing a chart in Probability View or Classic View that contains filtered data, the filter criteria are displayed at the top of the chart.
> Request your Full Version
60-Day Free Trial - Today!
The software included in this Mitutoyo FREE TRIAL can be used for 60 days after installation.
Available in 17 different languages.
Please let us know your contact details.
Database Management System (DBMS) Requirements
MeasurLink 10 ships with a copy of Microsoft SQL Server 2019 Express Edition. This can be for a standalone or a workgroup installation, although the Express version of SQL Server is not recommended for customers with more than 5 licenses.
MeasurLink 10 also supports the following Microsoft SQL Server versions:
• Microsoft SQL Server 2019 all editions
• Microsoft SQL Server 2017 all editions
• Microsoft SQL Server 2016 all editions
• Azure Microsoft SQL Server
Operating System Requirements
All MeasurLink 10 products are supported on the following Microsoft Windows Operating System versions:
• All Windows 11 64bit versions
• All Windows 10 64bit versions
By requesting the Mitutoyo 60-DAY MEASURLINK 10 FREE TRIAL you agree that an authorized representative of Mitutoyo Europe will contact you via email to provide you with a download URL for your 60-DAY MEASURLINK 10 FREE TRIAL. This requires completeness and correctness of your contact information, especially email and your telephone number.
Data protection is a matter of trust – and your trust is important to us. We – Mitutoyo Europe GmbH – respect your privacy and personal sphere. The protection, lawful collection, processing, and use of your personal data are important considerations to us. In order for you to feel secure when visiting our website, we strictly observe the legal regulations when processing your personal data and would like to inform you about our data collection and use of data.
Please refer to our Privacy Policy.
The General Terms and Conditions of Licensing for the Use of Computer Programs (Software) (GTB) of Mitutoyo Europe GmbH are applied to this offer.
Download the NEW Measurlink 10 Introduction Leaflet
Related


